Setting up an Overpass API server - how hard can it be?
Posted by SomeoneElse on 17 February 2026 in English. Last updated on 27 February 2026.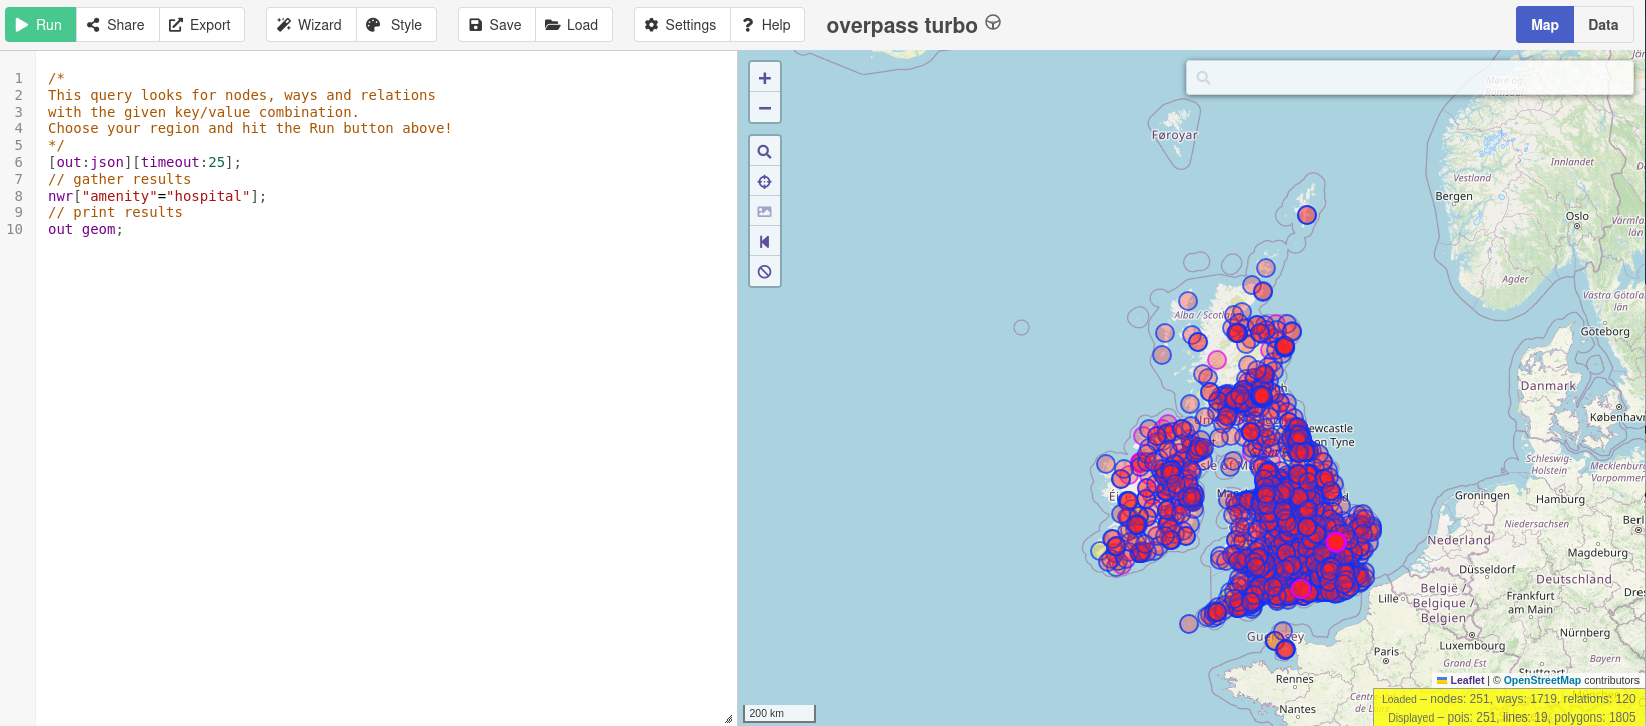
Many people have noticed that publicly available Overpass servers have been suffering from overuse (a typical “tragedy of the commons”). OSM usage policies generally contain the line “OpenStreetMap (OSM) data is free for everyone to use. Our tile servers are not”. Unfortunately, there have been problems with overuse of the public Overpass servers, despite the usage policy. “Just blocking cloud providers” isn’t an option, because (see here - use the translate button below) lots of different sorts of IP addresses, including residential proxy addresses, are the problem.
People who want to use e.g. Overpass Turbo do have the option to point it at a different Overpass API instance. If you’re using Overpass Turbo and you get an error due to unavailability, likely that is because the Overpass API that it is using is overwhelmed. There are other public Overpass API instances, but they may be complete (in terms of geography, or history) or up to date.
At this point, if you’re one of the people who created the problem you’ll likely just spin up more instances to retry after timeouts and make the problem worse. Most people reading this are I hope not in that category. There are commercial Overpass API providers - more details for the example in that table can be found here.
Other people (including me) might wonder whether it’s possible (without too much work) to set up an Overpass API server that just covers one or two countries. To keep it simple, let’s restrict myself to Britain and Ireland 2.3GB in OSM, and let’s not worry about Attic Data (used for “queries about what was in OSM in the past”) or metadata.
Let’s just try and do regular Overpass queries such as you might start from this taginfo page, like this. I’ll also only target the Overpass API, and will use “settings” in an Overpass Turbo instance to point to my Overpass API server. I do want to apply updates as OSM data is changed.
I’m interested in creating a server covering the UK and Ireland. In terms of size, have a look at how much bigger or smaller your area of interest is than the 2.3GB of Britain and Ireland below and use that to judge what size server you might need.
Documentation
At this point it’s perhaps worth mentioning that the documentation around Overpass is … (and I’m channelling my inner Sir Humphrey here) “challenging”.
There’s the OSM wiki which talks about “Debian 6.0 (squeeze) or Debian 7.0 (wheezy)”, the latter of which went EOL in May 2018. There is also an HTML file on overpass-api.de. That is … (engages Sir Humphrey mode again) not entirely accurate, in that it says to run something that doesn’t exist if you’ve cloned the github repository.
One of the best document by far is external and is by ZeLonewolf, which starts off by saying “I found the existing guides to be lacking”. It then says “This is a combination of various other guides, the official docs, Kai Johnson’s diary entry…”
(which is the other “best document”)
“… and suggestions from @mmd on Slack. This guide is intended to demonstrate how to configure a server dedicated to only running overpass”. Kai’s diary entry from 2023 is definitely worth reading (sample quote there “Running an Overpass server is not for the faint of heart. The software is really finicky and not easy to maintain. You need to have some good experience with Linux system administration and the will and patience to deal with things that don’t work the way they’re supposed to”).
Also, this github issue (and things linked from it) summarises some of the issues that I had on the way to getting my test server set up.
Where what I’m doing below differs from what the other guides say I’ll try and say why I am doing it differently. Usually it’s because my requirements are different (e.g. an overpass server for a small area rather than everywhere, on a VSP rather than a piece of tin, or because I need limited functionality).
Server
For my use case, we’ll need a server that is publicly accessible on the internet to do this. I’m already a customer of Hetzner, so I’ll create a test server there. Other providers are available, and may make more sense depending where you are in the world and how much you want to pay. For testing, spinning up something at one of the hyperscalers might make financial sense, but I suspect not long-term. I went with a CX43 with 160GB of SSD disk space, 16GB RAM and a rather large amount of bandwidth. This turned out to be about the right size for Britain and Ireland. I went with Debian 13 and public ipv4 and ipv6 addresses. I don’t know if Overpass releases need a particular architecture, but went with “x86” rather than “ARM” just in case.
If you’re needs are different you don’t have to use a cloud server for this. and Kai’s diary entry has a lot of information about physical server sourcing and setup.
Sizing was alas largely guesswork and trial and error - while I’m sure that the commercial providers know chapter and verse on this, there isn’t a lot written down about “sizing based on extract size” that isn’t “how long is a piece of string”. I found that loading even North Yorkshire (just 56MB in OSM) created a nodes file in the database area of 23GB, so that sets the minimum server size, even for very small test extracts.
The speed of the disk used needs to be able to apply updates in less time than the updates are of. If it takes 2 hours to apply 1 hour of updates, your server will never catch up. In practice I didn’t find this to be an issue with the servers at Hetzer and the relatively small extracts that I was working with.
Initial server setup
In what follows I’ll use youruseraccount, yourserver and yourdomain in place of the actual values I used.
I already have some ssh keys stored at Hetzner, so when buying the server, I chose a new name in the format “yourserver.yourdomain” and added my ssh keys. I have yourdomain registered at a DNS provider, and I added the IPV4 and IPV6 addresses there. I can now ssh in as root to “yourserver.yourdomain”, and run the usual:
ssl -l root yourserver.yourdomain
apt update
apt upgrade
and bounce the server and log back in again.
The next job is to create a non-root account for regular use and add it to the “sudo” group:
useradd -m  youruseraccount
usermod -aG sudo youruseraccount
chsh -s /bin/bash youruseraccount
I’ll create a new password in my password manager for youruseraccount on this server (obviously I used my account name rather than actually youruseraccount, but you get the idea…). Next, set the new account password to the newly chosen password
passwd youruseraccount
and check I can login to the new server as youruseraccount with that password, and become root:
ssh -l youruseraccount yourserver.yourdomain
sudo -i
exit
Install some initial software:
sudo apt install emacs-nox screen git tar unzip wget bzip2 net-tools curl apache2 wget g++ make expat libexpat1-dev zlib1g-dev libtool autoconf automake locate
That list includes both software prerequisites (apache2) and things that will be really useful (screen). It also includes emacs as a text editor; you can use your preferred one instead wherever emacs is mentioned below.
To use screen you just type screen and then press return. You can manually detach from it by using ^a^d and later reattach by using “screen -r”. If there are multiple screens you can attach to you’ll see something like this:
There are several suitable screens on:
    95207.pts-2.h23 (02/15/2026 09:20:20 AM)        (Detached)
    95200.pts-2.h23 (02/15/2026 09:19:57 AM)        (Detached)
    1633.pts-2.h23  (02/14/2026 12:37:50 PM)        (Attached)
Type "screen [-d] -r [pid.]tty.host" to resume one of them.
and you can choose which one to reconnect to by typing in (say) “95207” and pressing “tab”. To force a reconnection to a screen that something else is attached to, use “screen -d -r”.
In many cases below I’ll say “(in screen)” - this just means it’s a good idea to run these commands from somewhere that you can detach from and reattach to. It doesn’t mean you need to create a new screen every time.
The ssh keys that I had stored have been added for root by Hetzner, but I also want to add them to my new account too:
sudo -i
sudo -u youruseraccount -i
ssh-keygen -t rsa
(either use existing password for ssh passphrase, or create and store a new one)
exit

cp /root/.ssh/authorized_keys /home/youruseraccount/.ssh/
emacs /home/youruseraccount/.ssh
… and in there change the ownership of the files to youruseraccount.
Next, check that you can ssh in to yourserver.yourdomain without a password. Next disable regular password access. We don’t want people to be able to brute force password access to a server on the internet, so we can just turn this off.
sudo emacs /etc/ssh/sshd_config
Find the line that says
# To disable tunneled clear text passwords, change to "no" here!
and uncomment and change the next two lines to say
PasswordAuthentication no
PermitEmptyPasswords no
save the file and then
sudo /etc/init.d/ssh restart
and then try and login (from the shell on that machine will work as a test)
ssh 127.0.0.1
It should say Permission denied (publickey).
Setting up a certificate is the next priority. Everything on the internet these days pretty much assumes https access, so let’s do that before even thinking about overpass. I’ll use acme.sh for that. Other providers and tooling are available and you can use them if you prefer. Login as your non-root account and then:
sudo -i
cd
wget -O -  https://get.acme.sh | sh -s email=youremailaddress
exit
sudo -i
/etc/init.d/apache2 stop
acme.sh --standalone --issue -d yourserver.yourdomain -w /home/www/html  --server letsencrypt
the last lines of the output you get should be like
-----END CERTIFICATE-----
[Sat Feb 14 12:51:45 AM UTC 2026] Your cert is in: /root/.acme.sh/yourserver.yourdomain_ecc/yourserver.yourdomain.cer
[Sat Feb 14 12:51:45 AM UTC 2026] Your cert key is in: /root/.acme.sh/yourserver.yourdomain_ecc/yourserver.yourdomain.key
[Sat Feb 14 12:51:45 AM UTC 2026] The intermediate CA cert is in: /root/.acme.sh/yourserver.yourdomain_ecc/ca.cer
[Sat Feb 14 12:51:45 AM UTC 2026] And the full-chain cert is in: /root/.acme.sh/yourserver.yourdomain_ecc/fullchain.cer
Next do
sudo a2ensite default-ssl
sudo a2enmod ssl
sudo systemctl reload apache2
and then edit the default site config
sudo emacs /etc/apache2/sites-enabled/default-ssl.conf
Replace the SSL references with the correct ones.
SSLCertificateFile      /root/.acme.sh/yourserver.yourdomain_ecc/fullchain.cer
SSLCertificateKeyFile   /root/.acme.sh/yourserver.yourdomain_ecc/yourserver.yourdomain.key
Restart apache
sudo systemctl restart apache2
and browse to https://yourserver.yourdomain to make sure that the certificate is working. You’ll need to arrange for that certificate to be renewed every couple of months, but let’s concentrate on overpass for now.
That is it for the initial server setup, so now would be a good time for a server snapshot or other sort of backup.
Setting up the user for Overpass
For this part, we’re going to follow parts of ZeLoneWolf’s guide. I’ve reproduced that mostly as written below, although some of the software already was installed earlier.
sudo su

mkdir -p /opt/op
groupadd op
usermod -a -G op youruseraccount
useradd -d /opt/op -g op -G sudo -m -s /bin/bash op
chown -R op:op /opt/op
apt-get update
apt-get install g++ make expat libexpat1-dev zlib1g-dev apache2 liblz4-dev curl git
a2enmod cgid
a2enmod ext_filter
a2enmod headers

exit
The username that we created above is “op”. We won’t use a password for that but will just use
sudo -u op -i
when we need to change to it from our normal user account.
Configuring Apache
We already have Apache set up with a default HTTPS website that says “It works!”. We’ll use some of what’s in ZeLoneWolf’s Guide but we DON’T want to completely replace our config with that one. Instead we’ll selectively copy in some sections. Edit the file as is:
sudo emacs /etc/apache2/sites-available/default-ssl.conf
Note that we are using https with the defaults and the filename is different to the example.
Find this line:
DocumentRoot /var/www/html
and after it insert this section:
# Overpass API (CGI backend)
ScriptAlias /api/ /opt/op/cgi-bin/

<Directory "/opt/op/cgi-bin/">
        AllowOverride None
        Options +ExecCGI -MultiViews +SymLinksIfOwnerMatch
        Require all granted

        # CORS for Overpass Turbo
        Header always set Access-Control-Allow-Origin "*"
        Header always set Access-Control-Allow-Methods "GET, POST, OPTIONS"
        Header always set Access-Control-Allow-Headers "Content-Type"
</Directory>

# Compression (for API responses)
ExtFilterDefine gzip mode=output cmd=/bin/gzip

# Logging
ErrorLog /var/log/apache2/error.log
LogLevel warn
CustomLog /var/log/apache2/access.log combined

# Long-running Overpass queries
TimeOut 300
I then deleted a bunch of lines, all comments of functional duplicates of what we had just added, down to but not including:
# SSL Engine Switch:
Save and restart apache:
sudo /etc/init.d/apache2 restart
and check that you can still browse to “https://yourserver.yourdomain”. It won’t look any different as the default website has not been changed; we’ll test the “cgi-bin” parts later.
Compile and Install Overpass
This is drawn directly from ZeLoneWolf’s guide. Note that this does NOT clone the github repository and build it locally. At the time of writing the latest version is “v0.7.62.10” so you’ll see that number below.
sudo -u op -i

cd
wget https://dev.overpass-api.de/releases/osm-3s_latest.tar.gz
tar xvzf osm-3s_latest.tar.gz

cd osm-3s_v0.7.62.10/

time ./configure CXXFLAGS="-O2" --prefix=/opt/op --enable-lz4
That took 5s when I ran it. Next:
time make install
That took 9 minutes. Next:
cp -pr cgi-bin ..
cd
chmod -R 755 cgi-bin
mkdir db
mkdir diff
mkdir log
cp -pr osm-3s_v0.7.62.10/rules db
Those three directories created are for the database, minutely diff files and logfiles. In operation, the biggest by far will be “db” - we’ll expect 2.3GB of .pbf extract to create a database of initially 80GB or so. We’ll talk more about this later.
Loading OSM Data
The equivalent section of ZeLoneWolf’s guide is called “Download the Planet”. We don’t actually want to do that - we just want a data extract for our area of interest.
I’ll download a Geofabrik extract in my normal user account and make sure that it is accessible to the “op” user. Firstly browse to (in my case) https://download.geofabrik.de/europe/britain-and-ireland.html . There is a link there to https://download.geofabrik.de/europe/britain-and-ireland-latest.osm.pbf and a comment that says something like “This file was last modified 22 hours ago and contains all OSM data up to 2026-02-12T21:23:29Z”.
When logged in as youruseraccount:
mkdir ~/data
cd ~/data
time wget https://download.geofabrik.de/europe/britain-and-ireland-latest.osm.pbf
I then moved the file so that the filename contained the timestamp
mv britain-and-ireland-latest.osm.pbf britain-and-ireland_2026-02-12T21:23:29Z.osm.pbf
That is a .pbf format download - that format was introduced to OSM around 2010 and is basically pretty standard now. Unfortunately, Overpass still needs the previously used .bz2 format, but we can convert it:
(in screen)
sudo apt install osmium-tool
time osmium cat britain-and-ireland_2026-02-12T21\:23\:29Z.osm.pbf -o britain-and-ireland_2026-02-12T21\:23\:29Z.osm.bz2
That took around 1 hour 20 minutes (and frustratingly the progress bar looks like it was written by someone from Windows 2000) - don’t cancel it if it appears to be stuck, instead have a look to see if it is actually writing out a file. If you want to verify the resulting file:
(in screen)
time bzip2 --test britain-and-ireland_2026-02-12T21\:23\:29Z.osm.bz2
That took around 11 minutes for me.
Still as youruseraccount, make the download area browsable via the “op” user”::
chmod o+rx ~
chmod o+rx ~/data
If you’re not comfortable with this then you can of course copy or move the file as root later.
Configure launch scripts.
This is based on ZeLoneWolf’s guide again, which in turn is using scripts that Kai Johnson wrote.
As the overpass user:
mv bin bin.bak && mkdir bin
git clone --depth=1 https://github.com/ZeLonewolf/better-overpass-scripts.git bin
rm -rf bin/.git
and we’ll need to copy some things from the build into that directory. This will include at least:
cp /opt/op/osm-3s_v0.7.62.10/bin/update_database bin/
cp /opt/op/osm-3s_v0.7.62.10/bin/update_from_dir bin/
cp /opt/op/osm-3s_v0.7.62.10/bin/osm3s_query bin/
cp /opt/op/osm-3s_v0.7.62.10/bin/dispatcher bin/
but I actually copied everything missing from the new “bin” directory. We installed “locate” above. If anything hs been inadvertantly missed you can use e.g. “locate nameofmissingthing” and it will find it. This is a bit messy, and it’d be great to have something that’s a bit more solid and has less of the “porcine face paint applicator” feel to it; but I did not want to go too far down that road as I was trying to set something up “without too much work”.
Change the scripts to work with data extracts and no attic or meta data
We’re going to load a data extract from Geofabrik, and we’d also like to be able to update it with changes as other people update OSM. Normally the workflow that I’d suggest for this sort of thing is to download minutely updates from https://planet.osm.org, use trim_osm.py to snip them down to the area that we’re interested in and then apply those as updates.
By default, Overpass does run with planet.osm.org minutely diffs but alas I’ve struggled to get those to work with a data extrct; the updater falls over when it finds certain sorts of data that it is not expecting (i.e. was never originally loaded) in diff files. However, Geofabrik does provide daily diff files that match their extracts, so we can use those instead.
Also, we’re only interested in “now” data - we’re not creating an Overpass server with “attic” data that allows us to query data from back in 2012.
We therefore have to make a bunch of changes to scripts.
startup.sh
In there, we will change “https://planet.openstreetmap.org/replication/minute” to “https://download.geofabrik.de/europe/britain-and-ireland-updates”.
We’ll change --meta=attic to --meta=no because we’re not doing anything with “attic” data.
We’ll remove the --attic from the “dispatcher” call.
apply_osc_to_db.sh
We’ll change EXPECTED_UPDATE_INTERVAL from 57 to 3557 or even longer. We’re expecting files once a day not once a minute, but checking every hour is not too bad.
log file management
There’s a section in ZeLoneWolf’s guide that covers this.
Log files will eventually grow large and will eventually need a log rotation mechanism to be set up, but let’s gloss over that for now as I’m eager to see Overpass actually running!
Server automation
See ZeLoneWolf’s guide.
I have deliberately not done this yet as I don’t want to automatically do anything; rather I’d like to control it manually so that I can watch that it does what it is supposed to.
Load the data.
(in screen)
time bin/init_osm3s.sh /home/youruseraccount/data/britain-and-ireland_2026-02-12T21\:23\:29Z.osm.bz2 "db/" "./" --meta=no
That took about 77 minutes for me. Lots of files will have been created in “db”. A quick check on disk usage is in order:
df .
Filesystem     1K-blocks     Used Available Use% Mounted on
/dev/sda1      157207480 76407544  74363468  51% /

op@h23:~$ fc du
du -BG db/* | sort -n -r | head
53G     db/nodes.map
9G      db/ways.map
3G      db/ways.bin
3G      db/nodes_meta.bin
3G      db/nodes.bin
2G      db/way_tags_global.bin
2G      db/ways_attic.map
2G      db/nodes_attic.map
1G      db/way_tags_local.bin.idx
1G      db/way_tags_local.bin
It’s worth noting that those are large numbers for an extract. The 2.3GB data extract has created a 53GB nodes.map file. Compression is supported, but I haven’t tested it.
Set up replicate_id
There’s a file in the db directory (which will be created if it does not already exist) that determines the place to start consuming diffs from. These vary by server; the number corresponding to planet.osm.org replication from a certain data will different to the one for Geofabrik replication for the same date.
In our example we’re using Geofabrik data from 12th Feb 2026. We can browse through https://download.geofabrik.de/europe/britain-and-ireland-updates/ and https://download.geofabrik.de/europe/britain-and-ireland-updates/000/004/ until we find the immediately prior state file https://download.geofabrik.de/europe/britain-and-ireland-updates/000/004/693.state.txt , which contains sequenceNumber=4693. This means that 4693 is our magic number.
We’ll therefore edit the replicate_id file (creating it if it does not exist) and write 4693 (with a linefeed after) to it.
Before we do anything else, now is a good opportunity for another snapshot.
Start overpass
If this isn’t the first time you’ve started overpass you may want to take backup copies of previous “diff” directories or “log” files. Then:
bin/startup.sh
You should see something like this:
[2026-02-15 12:43:14] INFO: Starting Overpass API components...
[2026-02-15 12:43:14] INFO: Starting base_dispatcher...
[2026-02-15 12:43:14] INFO: Cleaning up stale files...
[2026-02-15 12:43:14] INFO: base_dispatcher is running (PID: 107771)
[2026-02-15 12:43:14] INFO: Starting area_dispatcher...
[2026-02-15 12:43:14] INFO: area_dispatcher is running (PID: 107783)
[2026-02-15 12:43:14] INFO: Starting apply_osc...
[2026-02-15 12:43:14] INFO: apply_osc is running (PID: 107795)
[2026-02-15 12:43:14] INFO: Starting fetch_osc...
[2026-02-15 12:43:14] INFO: fetch_osc is running (PID: 107835)
[2026-02-15 12:43:14] INFO: Performing final verification...
[2026-02-15 12:43:16] INFO: base_dispatcher verified (PID: 107771)
[2026-02-15 12:43:17] INFO: area_dispatcher verified (PID: 107783)
[2026-02-15 12:43:17] INFO: apply_osc verified (PID: 107795)
[2026-02-15 12:43:17] INFO: fetch_osc verified (PID: 107835)
[2026-02-15 12:43:17] INFO: All Overpass components started successfully

[2026-02-15 12:43:17] INFO: === Process Status ===
  base_dispatcher      PID: 107771
  area_dispatcher      PID: 107783
  apply_osc            PID: 107795
  fetch_osc            PID: 107835
In the directories below “diff”, you should see that it has downloaded daily diffs for any days since your extract, for example:
  /opt/op/diff/000/004: (56 GiB available)
  drwxrwxr-x 2 op op    4096 Feb 16 01:07 .
  -rw-rw-r-- 1 op op 3874289 Feb 16 01:07 697.osc.gz
  -rw-rw-r-- 1 op op     113 Feb 16 01:07 697.state.txt
  -rw-rw-r-- 1 op op 3033325 Feb 15 12:43 696.osc.gz
  -rw-rw-r-- 1 op op 3405594 Feb 15 12:43 695.osc.gz
  -rw-rw-r-- 1 op op 3057997 Feb 15 12:43 694.osc.gz
  -rw-rw-r-- 1 op op     113 Feb 15 12:43 695.state.txt
  -rw-rw-r-- 1 op op     113 Feb 15 12:43 696.state.txt
  -rw-rw-r-- 1 op op     113 Feb 15 12:43 694.state.txt
  drwxrwxr-x 3 op op    4096 Feb 15 12:43 ..
In “log” you should see something like:
  /opt/op/log: (56 GiB available)
  -rw-rw-r--  1 op op  12111701 Feb 16 23:39 apply_osc_to_db.out
  drwxr-xr-x 13 op op      4096 Feb 16 20:14 ..
  drwxrwxr-x  2 op op      4096 Feb 15 12:43 .
  -rw-rw-r--  1 op op         0 Feb 15 12:43 osm_base.out
  -rw-rw-r--  1 op op         0 Feb 14 14:26 fetch_osc.out
  -rw-rw-r--  1 op op         0 Feb 14 14:26 areas.out
Testing standalone
At the command line type:
bin/osm3s_query
Paste in this:
<query type="nwr"><bbox-query n="51.96" s="51.86" w="-3.31" e="-3.22"/><has-kv k="amenity" v="pub"/></query><print/>
Press return. Press ^d. A selection of data will be returned.
Testing from Overpass Turbo
In a web browser, browse to https://overpass-turbo.eu/s/2kEW .
Click “settings”. Change “server” from “https://overpass-api.de/api/” to “https://yourserver.yourdomain/api/”. Click “run”. You should not get an error, and should get a couple of nodes and 4 ways returned.
For the avoidance of doubt - if you browse to “https://yourserver.yourdomain/” you’ll get some sort of “It works!” page. If you browse to “https://yourserver.yourdomain/api/” you’ll actually get an error - it’s designed to be accessed (see the CORS settings above) by Overpass Turbo, not a regular browser.
Now what?
Shutting everything down and taking a snapshot of the server is a good idea at this point. The long-term cost of snapshots is small (€0.20 per month or so). The cost of leaving a server of this specification running 24x7 isn’t that large - around €10, perhaps a couple of beers or a couple of fancy coffees.
You might also want to think about setting up an Overpass server that does include metadata and attic data - but you’re probably better off with a dedicated server for that, and better off following one of the other guides linked above.
Areas?
One thing that you can also do is add support for area searching.
ZeLoneWolf’s guide covers this here, but note that the script to run is now called single_pass_area_updater.sh. It took just over an hour on a test server loaded with Britain and Ireland data.
[2026-02-27 16:23:33] INFO: ==========================================
[2026-02-27 16:23:33] INFO: Area update started
[2026-02-27 16:23:33] INFO: ==========================================
[2026-02-27 16:23:33] INFO: Starting area update with rules from /opt/op/db/rules/areas.osm3s
[2026-02-27 17:28:12] INFO: Area update completed successfully (duration: 01:04:39)
[2026-02-27 17:28:12] INFO: ==========================================
[2026-02-27 17:28:12] INFO: Area update finished successfully
[2026-02-27 17:28:12] INFO: ==========================================
A simple example of an area query is here.
Edits since originally written:
-
Minor clarification re use of Overpass API URL following a question on IRC.
-
various spelling mistakes
-
the “areas” section
Discussion
Comment from TheSwavu on 18 February 2026 at 08:57
Kai’s updated scripts can be found here: https://github.com/b1tw153/Overpass-API/tree/kai/improve-shell-scripts/src/bin
I’m assuming you have found the lz4 compression option. My AU extract has a db size of 11 GB.
OSM FR has minutely updates for their extracts if you want to keep a “live” copy https://download.openstreetmap.fr/.
Comment from SomeoneElse on 18 February 2026 at 22:00
Thanks (on all counts)!
The scripts at https://github.com/b1tw153/Overpass-API/tree/kai/improve-shell-scripts have “meta=yes” and no attic, which is similar to what I’m doing (I’m actually doing actually meta=no). I probably need to fork that and start adding changes for e.g. using a different source of .osc files, and automating the setup of replicate_id.
Re
meta=yesvsmeta=no, I’m unsure of the implications (see https://github.com/drolbr/Overpass-API/issues/774#issuecomment-3904199209 and probably need to test it.I’m aware of compression but haven’t tested it yet - I’m letting the update process continue until I need to do something about disk space, so that I’ve got a baseline to compare against. It’s up to 63% so far. I also need to set up log rotation.
Re minutely diffs, I’m actually looking for “Britain and Ireland” data so OSM FR’s extracts alas don’t work for me, but for most people I’m sure they would.
Comment from Kai Johnson on 23 February 2026 at 01:30
Nice write-up! I haven’t tried to get Overpass working with smaller extracts, so it’s good to see how that worked out.
I have been actively working on the updated scripts in my fork on Github. At the moment, that means that fetch_osc.sh got the most attention. Other scripts will get more work soon, starting with apply_osc_to_db.sh.
If you happen to bump into any issues with the scripts, I’d love to hear about them!
Comment from SomeoneElse on 26 February 2026 at 12:33
@Kai thanks - I will move the current server (which hasn’t fallen over or filled its disk yet!) to a new one, and will try and apply changes “properly” (from a forked github repo rather than copied from various places) so that if there is anything useful I can feed back I’ll be able to do it without guesswork.
Comment from Kai Johnson on 27 February 2026 at 00:01
I took a look at the issues you posted in the Overpass repo on Github. The incorrect messaging in shutdown.sh got a quick fix but that script is due for much more attention soon.
And I noted the issue you had with applying global diffs to the extract database. I think there’s a lock file issue lurking in there that needs more investigation. But that wouldn’t address the bigger issue of diffs needing to match the extract.
If you bump into any other configuration or operational issues, I’d be happy to help with those too!
Comment from Th-D on 15 March 2026 at 06:31
Great process overview @SomeoneElse! For anybody who is interested in installing Overpass using Ansible, there are Ansible scripts from OpenStreetMap.fr: https://codeberg.org/osm-fr/ansible-scripts/src/branch/master/roles/overpass-api
Comment from mmd on 6 April 2026 at 19:52
I would recommend to take a look at the Chef cookbook lonvia is maintaining to manage the official OSMF Overpass instance: https://github.com/openstreetmap/chef/tree/master/cookbooks/overpass
Although it is not specifically targeting the country extract edge case, it has some nice improvements all over the place.
Like I mentioned at different times in the linked Github issues, updating country extracts is a tricky use case and may easily break due to way geometry issues. This might leave your database in a broken state.
The combination of Geofabrik initial extract and daily updates seems to work ok. Other scenarios might just fail with a segmentation fault, even after some time. It’s simply not the (main) use case the tool has been designed for.