OAM-QGIS-plugin: Features and GUI design
Posted by tassia on 11 June 2015 in English. Last updated on 2 September 2015.Plugin required features
We have listed the following features to be included in the plugin first version:
- select input data (from individual files, a VRT or a loaded layer)
- insert/load/change metadata
- validate metadata
- choose OIN upload destination
- upload transaction
- notify OAM of new OIN resource
- trigger tile service on OAM
- authenticate to OAM (if requesting tile service)
- provide additional OAM metadata (if requesting tile service)
- re-projecting to EPSG:3857 (optional)
- convert format to GeoTIFF RGB (optional)
Regarding the metadata acquisition, we didn’t discuss yet about what can be extracted automatically from the GeoTIFF and what needs to be informed by the user.
GUI design
The list of features guided the plugin GUI design. I’ve first chosen Pencil as a GUI prototyping and sketching tool. It is a cross-platform tool based on mozilla firefox which can be installed as a Firefox extension, being accessible through its tools menu.
These quick tutorials demonstrate what can be done with pencil:
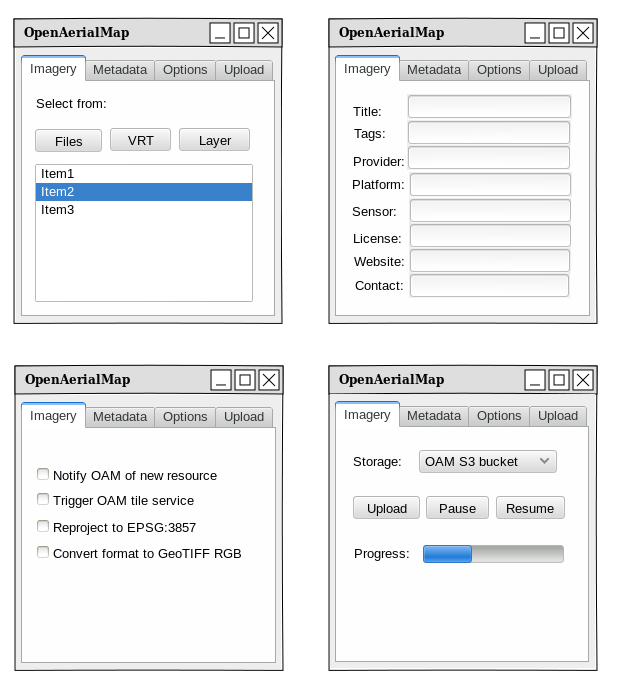
The draft mockups I’ve made with pencil are available in our repository. Here is the extracted png image:
Later on, when I was studying Qt-creator I discovered Qt-designer, a GUI prototying tool that does exactly what I needed for my draft mockups with the advantage that it generates code. With Qt-designer, the generated .ui file (a xml) can be later compiled into python code using the command pyuic4.
The other advantage of using Qt-designer is that we can be sure that every element placed in the GUI will have a Qt representation, while with Pencil we could be planning to use elements in a way that might be difficult or even not possible to implement. And even though both programs generate xml files to represent graphical elements, the one genereted by Qt-designer is much cleaner and can be easily edited with a text editor if needed.
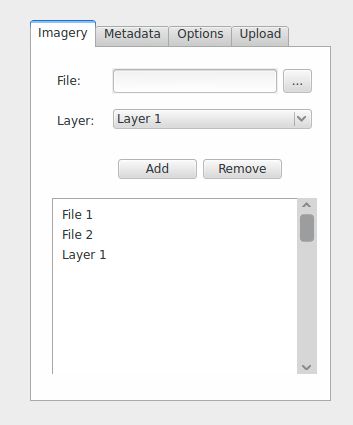
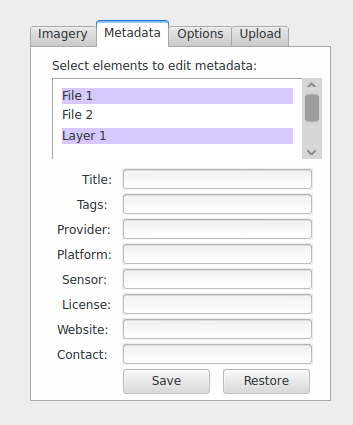
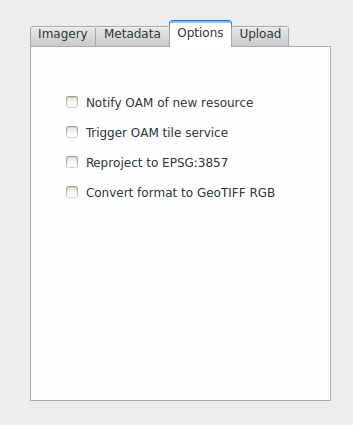
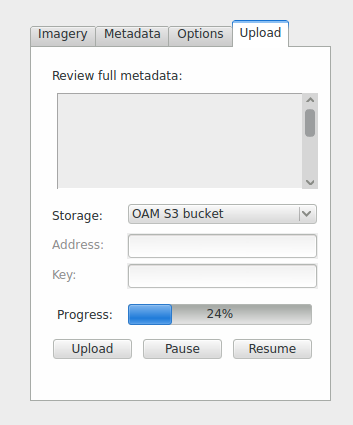
The wireframes developed with qt-designer (xml and images) are also [available in our repository] (https://github.com/hotosm/oam-qgis-plugin/tree/master/GUI_design/pencil). Below you have a snapshot of the current version. We are willing to have feedbacks to evolve the design, so if you have any comments or criticism, don’t hesitate to get in touch!
About Qt-creator
Qt-creator is a cross-platform, multi-language and multi-purpose IDE (Integrated Development Environment). Originally developed for C++, Javascript and QML, it currently also supports Python and other languages via its plugin architecture. Not only Qt applications are developed using Qt-creator, but any kind of application written in one of the supported languages.
Debbugging and version control system are some of the features integrated in the development enviroment (within the IDE). Another important tool is the management of translations. We can mark strings as translatable let Qt-creator take care of the rest. Among other features there are code highlighting, various navigation/documentation short-cuts, sessions saving, kits (set of settings) and screen split.
Qt-creator manual can be consulted as a reference. For a quick demostration of the IDE I’ve watched some videos, such as “Introduction to Qt Creator” by Tobias Hunger, a software engineer from the Qt Company.
Here is the demo summary, for future reference:
- Ctrl-K: powerfull tool for searching code (“c “ search for classes)
- Navigation
- ESC: go (closer) to code
- Alt-Left/Alt-Right: history-based cursor navigation
- Ctrl-Tab/Ctrl-Shift-Tab: pops-up and rotate among open documents
- F1,F2,F4: Help, follow symbol, switch header/source files
- Refactoring
- Ctrl-Shift-U, Ctrl-Shift-R: find usages, rename
- Alt-Return: quick fix
4. About Qt development
My next task in the project, scheduled for the following two weeks, is to rewrite the trial plugin used in my Outreachy application to include the list of required features listed above, but this time using qt-creator and QgisPluginCreator. So I thought it was time to study Qt more seriously.
I’ve decided to go for the basics and searched for a book, which usually builds up concepts without assuming previous knowledge from the reader. I am reading now “Rapid GUI Programming with Python and Qt: The Definitive Guide to PyQt Programming”, and I still have a lot of reading to do…
Discussion
Comment from russdeffner on 11 June 2015 at 18:51
That’s great Tassia! Thanks for the update!
=Russ