
Parking_space micromapping JOSM method overview
Posted by Lejun on 1 September 2021 in English. Last updated on 2 September 2021.Tag’s use
While the amenity=parking tag is used “de facto”, the amenity=parking_space micromapping oriented tag has been introduced and approved by vote on 2011-05-01. The main reason for it’s introduction is to help people, disabled or not, easily find parking spots inside parking lots without any important downside to it.
Other voted proposals introduced the parking:lane=* and parking=street_side tags and while those are quite useful (I’m still reserved concerning the first), I’d rather map parking spaces directly as those kind of parking’s capacity is generally quite low. The parking:lane proposal even adds:
Consider using parking:lane=* as a simple alternative if the streetside parking spaces are stretched over a longer section of the road and no micromapping of these areas is desired.
Ha! Which fool wouldn’t want some micromapping in its life? Micromapping is love, micromapping is but the purpose of life.
The tag is especially useful in combination with the footway=acces_aisle tag (not to be confounded with service=parking_aisle which is oriented towards vehicular routing) which is used for pedestrian routing in parking lots.
Tools
This tutorial makes use of the JOSM editor along with the BuildingsTools and Gridify plugins and the high resolution of aerial imagery in France. Some similar functions may be found on other editors that I don’t know of, feel free to try and find your own workflow in the journey for the slickest parking lot micromapping.
“Parking:orientation”
The main difficulty about mapping parking spaces comes from its typology. Up to now I have found four different kinds of geometry and I’ll go through them from the simplest to the hardest to map in my opinion. The overall pattern of those is implicit and it’s recommended to use the parking:orientation key to specify if necessary.
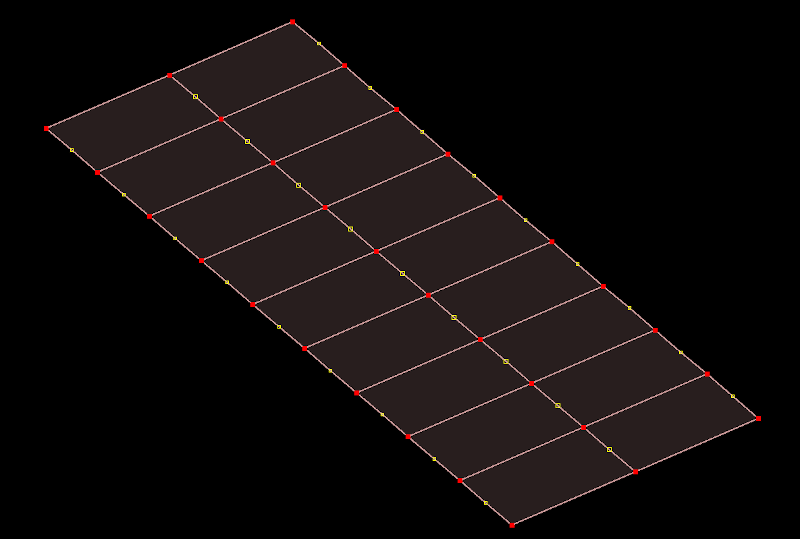
Straight (Parallel or perpendicular)
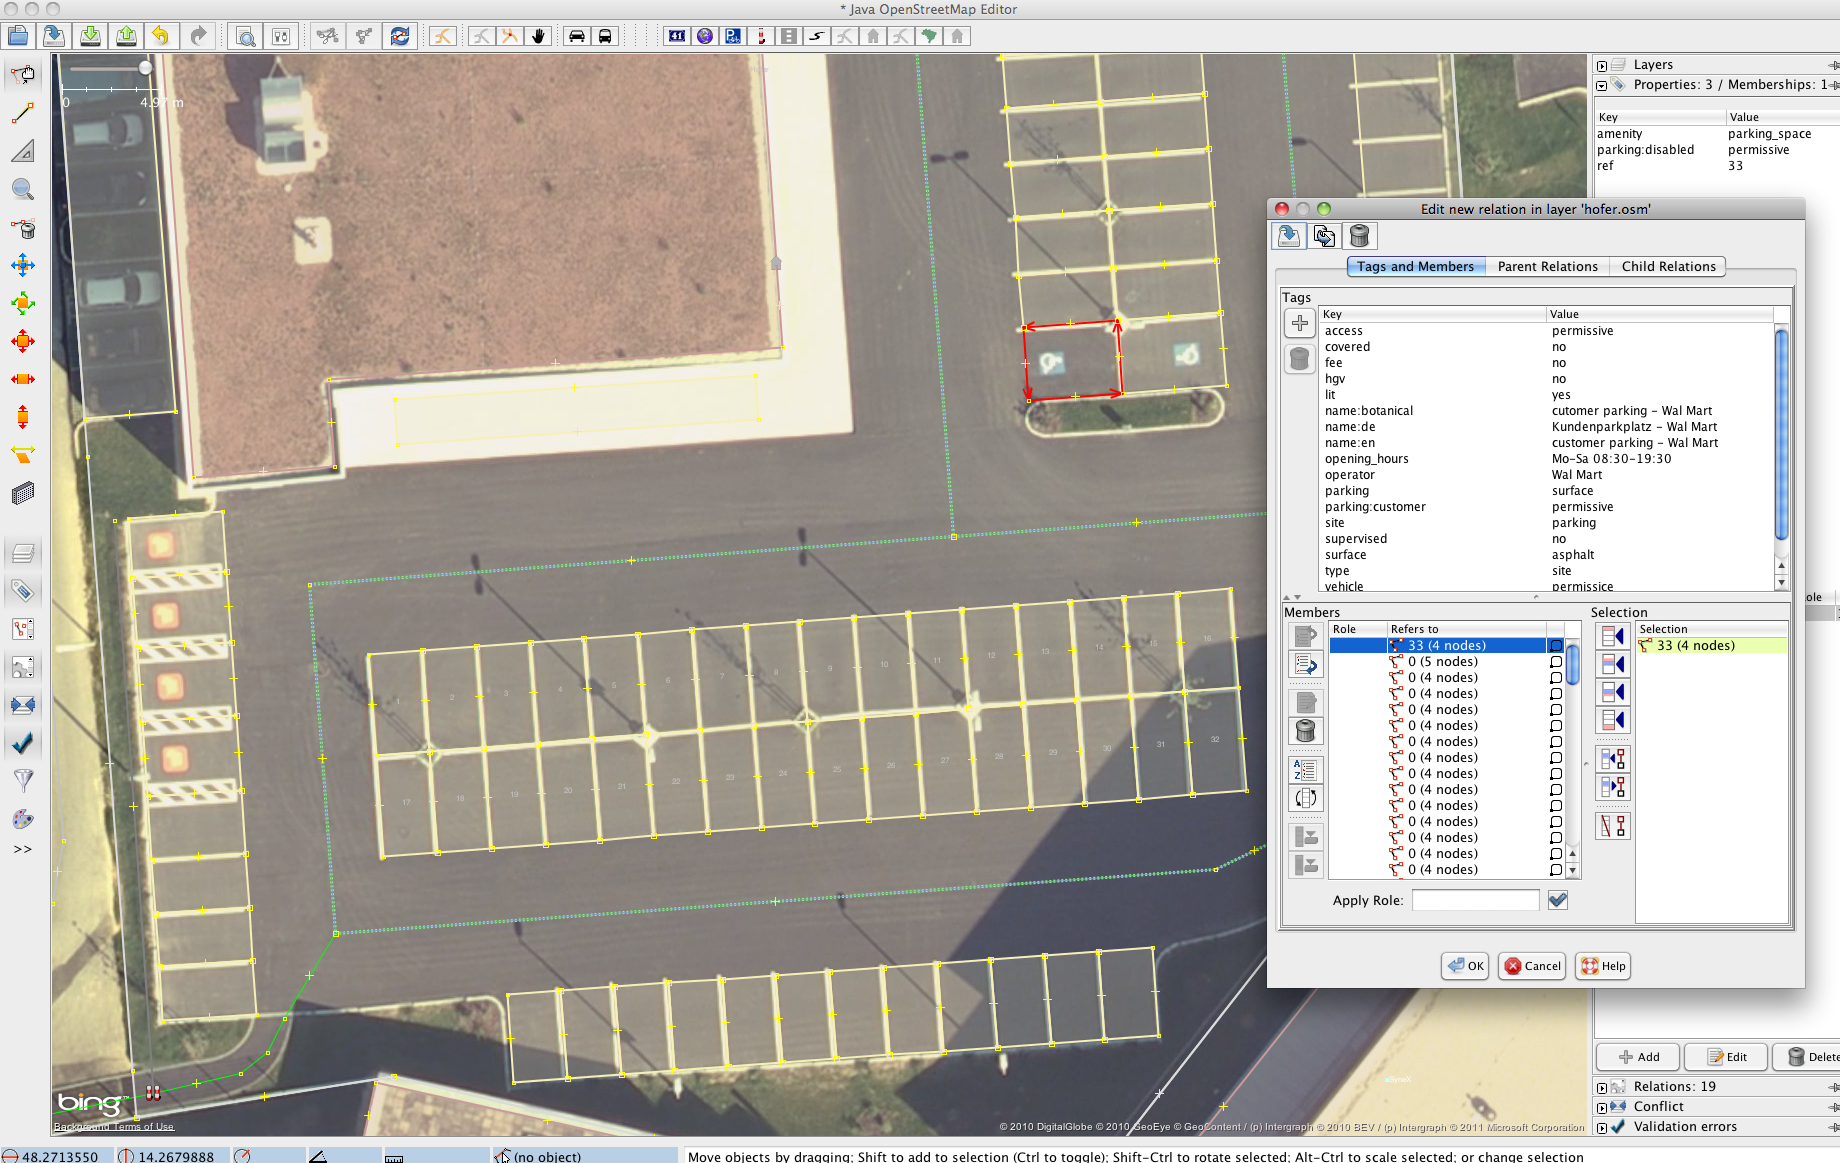
The simplest of them. Just draw a four nodes’ polygon and split into equal spaces. If feeling finicky, you can align it with the nearby access way and/or the building. To do so, I use the BuildingTools plugin.
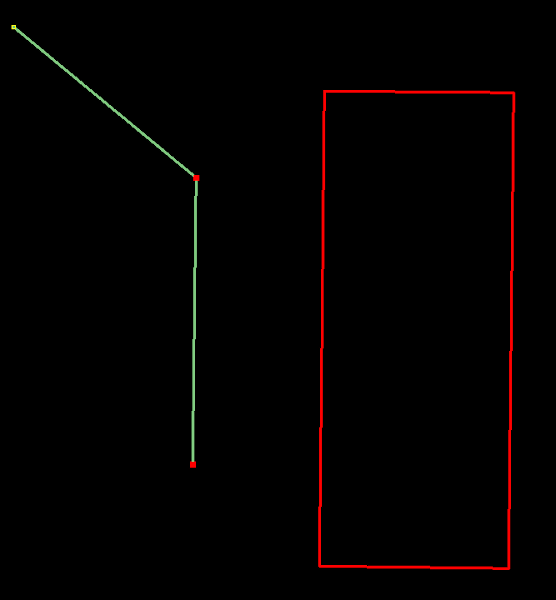
One of its function is to create a four nodes’ polygon aligned to another element when at least two nodes are selected. Just select two nodes from the way (the furthest the two are the better for precision) and use the plugin’s tool. Do not forget to remove the building=yes tag before upload and replace with the necessary tag(s).
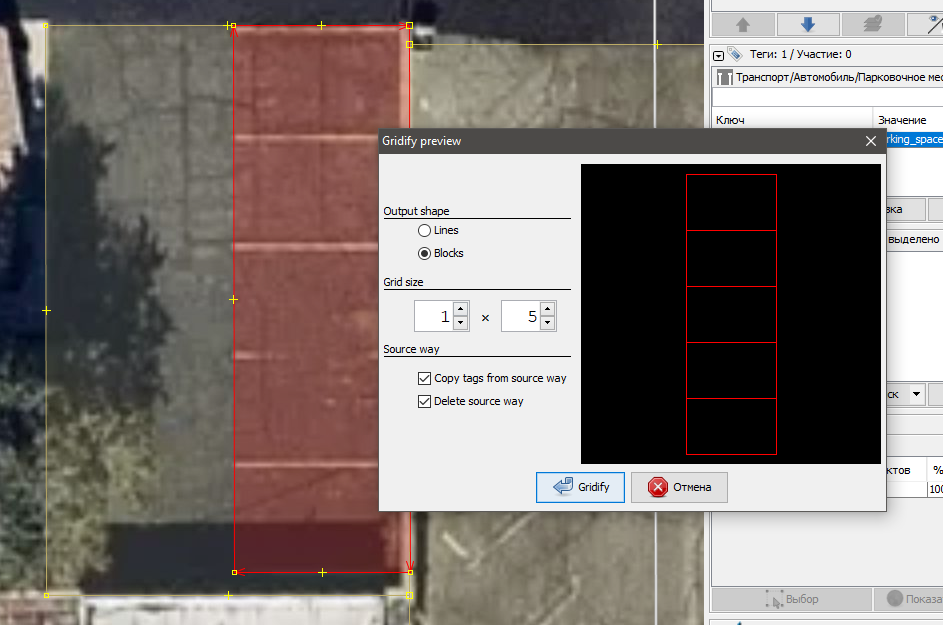
To split the newly created parking spaces row, I use the Gridify plugin to replace the row with X identical spaces with the added tags, X being the number of spaces I counted from aerial imagery. Do check the count, simply a matter of checking if the spaces are aligned to the painted line on the ground, as it’s easy to lose track after a few hours adding hundreds of them. If necessary I then add specific tags to individual spaces such as parking_space=disabled to indicate a parking space to be used by disabled exclusively. Do note that this way of tagging isn’t part of any approved proposal and is simply “in use”.
Diagonal
This kind add one more step to the straight spaces method caused by the angle relative to the trafic flow. To do so the simplest way is to move two nodes from the row before splitting, or the entire line of nodes after splitting. After eyeballing the angle, I like to use the “line alignment” function from BuildingTools to maintain identical angles between parking row.

Select two nodes from the first angle and use the plugin tool to make similar angled shape to other rows. Place nodes at the intersections and delete both the constructed shape and unecessary nodes.
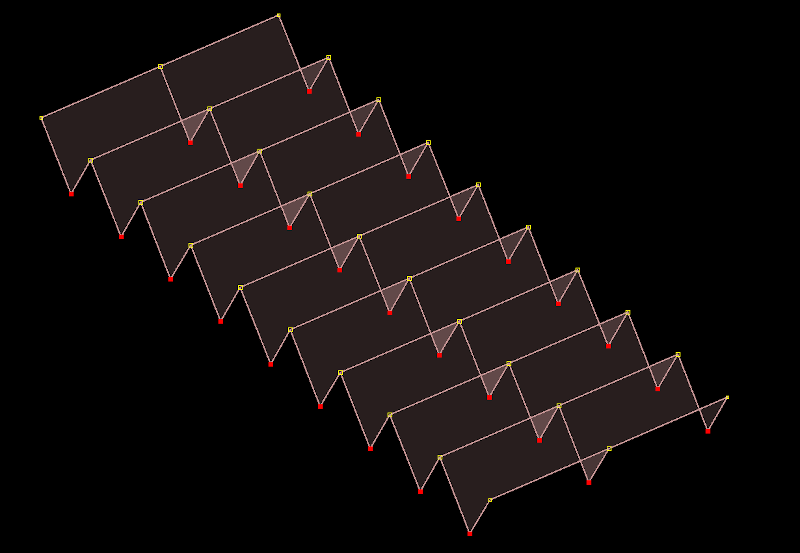
Herringbone
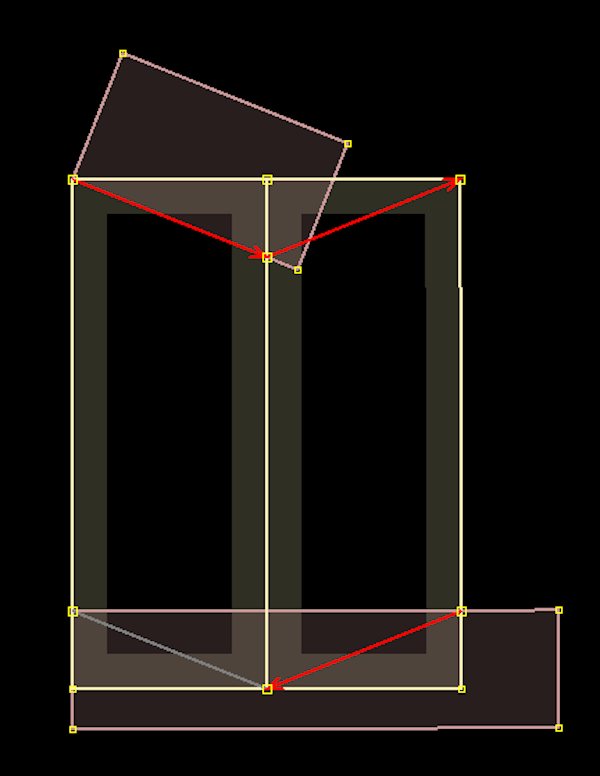
The method to map an herringbone style parking is similar to the diagonal method. One simply have to move the central nodes or the sides ones before splitting. Personnaly I do prefer the latter as I can make both sides symetrical. As before, I align the overall shape with the central line of the parking spaces and extend it to their depth. Then I create angled shapes after eyeballing one angle. One, pictured on the bottom, symetrical to the left side node, and a second one to have the central node on top. Using these two nodes I can then split each row.
Seesaw
This pattern is the most brainwrecking I encountered to date. While quite pretty, that is for a parking space, I just find it awful to map. The best method I have is to do it “manually” using the tools as alignment helpers. First create the overall shape of the spaces, angle it and split it.
Then manually add middle nodes to every column (JOSM have a function for equal distancing nodes the shortcut being Ctrl+B). Select every other node and move it to one side.
Select every “middle” nodes and move them to the other side as needed and congrats, you now have a kinda accurate seesaw pattern that you can use as a guide to outline every single parking space.
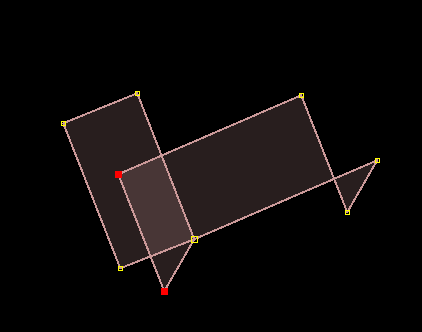
The seesaw pattern on the left side requires supplementary steps to generate. Just use the same method as aforementioned that is the buildingTools plugin to create regularly spaced intersections.
Conclusion
Here is an overview of my method for micromapping individual parking spaces. The method described may lack accuracy, if you know of any better way please do share it in the comments. While not necessarely useful nor groundbreaking, micromapping is possible using existing tools and should be considered not only for routing but as a supplementary way to support OpenStreeMap adoption by organisations.
Discussion
Comment from Glassman on 1 September 2021 at 22:46
I’ve been adding parking lots lately but haven’t gotten around to micromapping individual spaces. Maybe once I get done with the parking lots I’ll tackle individual spaces. How do you use the building tools to mapping parking spaces - do you change the tags associated with the object the tools creates?
Tip: to add an image in the diary use
For example,
becomesBest, Clifford
Comment from Lejun on 2 September 2021 at 03:07
The Gridify plugin apply the tags of the “overall shape” to the splitted elements. So it’s a generally a breeze to tag. The buildingTools plugin simply create elements with
building=yes, I delete it while still in “overall shape” and add the parking_space related tags before splitting.Ha, thanks for the tip! That’s what I thought but the preview somehow didn’t showed the pictures so I just let it has it is thinking the problem was coming from somewhere else (Some pics where freshly uploaded, that may have been the issue here).
Comment from m-ezd on 12 September 2021 at 13:07
You can change the default tags on the elements created by the buildingTools plugin (Data > Set buildings size > Advanced…).
Comment from Lejun on 12 September 2021 at 16:40
@m-ezd That’s nice to know! In my case I find it easier not to tinker too much with these settings especially as I also use it for it’s main purpose that is mapping buildings. It would be useful for anyone starting a mapping session in heavy parking areas.
Comment from jidanni on 20 September 2021 at 06:09
Glad that you are using air photos and not GPS in parking lots. I’m just worried if one day you will find your air photos were a meter or two off…
Comment from Lejun on 20 September 2021 at 15:45
@jidanni Ha, don’t worry about that. I’m not crazy enough to do that kind of mapping through GPS data (although I assume that would be fine using RTK devices).
I wouldn’t worry too much about aerial image offset either. In France we have access to building footprints through the Cadastre, using it as a baselayer it’s easy enough to verify the (absence of) image offset. In case someday we discover there is indeed some kind of offset, I assume it would be quite easy to simply move all the parking spaces elements.
Comment from jidanni on 20 September 2021 at 18:14
Perhaps be prepared for disasters by testing what kind of elements would be easy to move en masse. (Any at all?)
Comment from Lejun on 21 September 2021 at 03:49
As far as I know while disaster mapping for HOT, buildings are quite easy to mass relocate as long as nodes aren’t shared between elements. In this case, parking spaces doesn’t have to be linked to anything else, if not the parking polygon itself in certain configurations.
One would simply have to be careful of that matter and simply duplicate and separate shared nodes (Unglue function under JOSM, shortcut G) before moving.